Home Blog Page 7

Best pans for cooking pancakes for your meal

0

While you can have the best pancake recipe in the world, without the right pan, everything goes to waste. So, what are the best pans for cooking pancakes? We will be diving deep into that discussion here; if you want to find out, then stick around a little more.

Starting your morning with some pancakes is never a bad idea, right? It’s easy to make, time-saving, and tasty at the same time. However, there is a catch here. To make proper pancakes without ruining them requires a special type of pan.

Having said that, let’s get to know more about cooking pancakes and the best pans to do so. By the end of this, you will become a pancake pan guru yourself.

Why do you need a suitable pan for cooking pancakes?

It’s time to get to the real deal here; why do you even need a special pan for cooking pancakes? What does it even mean? Here, we will answer all of that to clear out your confusion.

Pans For Pancakes

To be honest, you can make a pancake in any pan you want, but they might not end up as edible pancakes. Or you might not be able to even cook them properly. And here’s why-

One of the most crucial parts of cooking pancakes is proper heat transfer. You will want to have a pan that can transfer heat quickly and cook the pancakes properly. This is where pancake pans excel with their thin layer. The pans you get specifically for cooking pancakes will be thinner than your regular frying pans.

Another important aspect of cooking pancakes is the flipping part. It’s only common sense at this point that you would want a non-stick pan to fulfill that flipping need. If your pancake is stuck to your pan, then you are using the wrong pan and ending up with bad pancakes.

So, these are the two reasons for getting a special pan for cooking pancakes. In summary, the characteristics of the best pans for cooking pancakes should be flat, shallow, thin, and non-sticky.

what is the best pan for cooking pancakes- buying Guide

Enough with the touch-ups, let’s take you through a whole technical detail of choosing the right pan for cooking pancakes. We will go through the various factors you should consider while choosing which one to buy.

Pan For Cooking PancakesMaterials

You will usually come across 4 types of materials for your pancake pans. They are as follows-

  • Cast Iron: Cast iron is a popular material used in many cooking pots and pans. It adds a good smoky flavor to your food and gives it a little bit of seasoning. But these pans will be a bit heavy, which can cause a problem for pancakes while flipping or serving them.

Also, they sometimes have sticking issues as well. A cast-iron pancake pan is good if you are looking for a long time and versatile use out of it.

  • Aluminum: When it’s about getting lightweight metal items, aluminum is a popular choice. You can find a great level of convenience while working with aluminum as it’s easy to control. The heat also distributes evenly on an aluminum pan. Also, it’s much more affordable than any other material.

However, it’s not the most durable material you can get. After some time, you will see the aluminum failing to hold up to scratches and bumps, which are pretty common in a kitchen.

  • Stainless Steel: In terms of pancake pan material, stainless steel has to be the best option. They are very durable, easy to clean, and aren’t that heavy. All in all, it’s a great option to go with.

The only downside to this will be the improper distribution of heat. Aluminum pans have better heat conduction than any stainless steel pancake pan.

  • Non-sticky: As we discussed earlier, you can’t even make a proper pancake without a non-stick pan. It’s a must that you get a non stick pancake pan as they will give you the best results. In the best pan to cook pancakes, you will want a non-stick surface.

With a non-stick pan, you won’t need too much oil to cook a pancake, and they cook faster than usual. So, considering every aspect, you must look for a pan that has this feature.

Buying Specialist pancake pan

Pancake pans

A specialist pancake pan has to have two things. The pan should be thinner than usual frying pans, and it has to be flat and shallow. These two qualities together make up a pan that is specialized for making pancakes.

With a thin pen, the heat conduction is fast and proper. That is exactly what you want while cooking pancakes. And a shallow and flat surface makes it very easy to flip the pancake and cook it properly. So, count on these two factors for a pan that you want to use for making pancakes specifically.

Pan For Cooking Pancakes- Size

Now, this factor is a flexible choice where you have to consider your needs. If you want to make larger pancakes and also use your pan for other cooking purposes, you should get a big pan. And if you are getting a pan just for making pancakes for a small number of people, then getting a small pan would be the way to go. So, it’s up to your needs and preferences for the pan size.

Pan For Cooking Pancakes- Cleaning Up process

Well, you won’t have to worry too much about the cleaning process of a pancake pan. The reason is for a pancake pan; you will be getting a non-stick pan. This means there won’t be much residue or junk on the pan in the first place. So, cleaning up becomes much easier for you.

The process is simple: use soap and running water to clean up the pans with a sponge. If you have by chance any burnt food on the pan, you can use some warm water to remove that food.

Also, cleaning materials will depend on the pan material. For example, you can’t use soap for a cast iron pancake pan. And you shouldn’t clean your non-stick pans on a dishwasher. So, you will have to keep these things in mind.

12 best pans for cooking pancakes

Finally, we are done giving all the knowledge and information about pancakes and pans for pancakes. Now, it’s time to check out the best pans for pancakes you can find out there.

We have chosen 12 pans that qualify to be proper pancake-making pans. You will surely find your one true choice of the pan in this list.

1. Cuisinart 623-24 Nonstick Classic Crepe Pan, Cuisinart Crepe Maker

Cuisinart 623-24 Nonstick

When it comes to cooking pancakes, you are in search of the best crepe pan that has a flat surface. And this pan fulfills that need with extreme precision. It has got a griddle-like cooking surface along with a little bit of raised sides.

As for the material, the exterior is hard anodized material that gives you great durability. As for the interior, you have a smooth non-stick surface exactly the way it should be for a pancake pan. The interior is reinforced with titanium which just elevates the material quality of this pan.

It doesn’t leave any room for doubts with the usability factor. You can use this in an oven for up to 500F, and it will hold up to that. Due to the non-stick surface, it becomes so much easier to clean and use.

Pros

  • Extremely durable material for the exterior build.
  • It has got a nice flat surface for making perfect pancakes. 
  • The great non-sticky interior makes it easy to use and clean 
  • The versatility of usage is quite commendable
  • No worries about burning your hand due to the SS handle.

Cons

  • The non-stick surface is prone to damage without any caution. 

2. T-fal B16713 Initiatives Nonstick Square Griddle Pan

T-fal B16713 Initiatives Nonstick

Want to go on a different path from the circular pans? Then try out this best square griddle pan with a square shape griddle. The design is already different from most other pans. It’s very thin and lightweight, which is a good feature to have in a pan for pancakes.

You will never question the durability of this one because of the stainless steel and aluminum build. For the interior, it has got a non-stick coating which is something you always need in a pan for making pancakes.

That’s not the only good part about this one. You get extreme usability out of it due to the riveted handles. Also, it’s oven safe for up to 350F, which is always a great addition to have. Finally, you can wash it on a dishwasher which takes away a lot of your extra work.

Pros

  • It comes with a unique large square shape. 
  • You get a non-stick coating surface on this one. 
  • It’s oven safe for up to 350F. 
  • The handle on this one is great for grip and comfort. 
  • It’s durable and lightweight.

Cons

  • After some heavy use, the pan can start to warp.
  • The pan may have uneven heat distribution after the warp.

3. Calphalon 2 Piece Classic Nonstick Frying Pan Set, Grey

Calphalon 2 Piece Nonstick Classic

Want to stick to the classic frying pan style? Well, you got it with this one. It has got that traditional shape of a Calphalon frying pan set with some sturdy construction in the handles. The design is curved, so nothing falls over the sides of the pan. It’s, without a doubt, one of the best pans for pancakes.

For the material, you get hard-anodized aluminum which is a great option for a pancake pan. It makes sure the pan will last long enough to satisfy you. Aside from that, it has got a double non-stick layer which gives you better performance and durability.

As far as usability goes, you shouldn’t have any problem with this one. It comes with even heating throughout the pan, so you get consistent cooking performance from it. Other than that, it is very easy to clean up because of the double non-stick layer.

Pros

  • It has a classic pan design for functionality 
  • The pan is sturdy and durable in construction 
  • With the double non-stick layer, it gives you great performance 
  • This one is very easy to clean 
  • It has got consistent heat distribution

Cons

  • It’s a bit thick, which takes a long time to heat.

4. Farberware High-Performance Nonstick Griddle Pan/Flat Grill

Farberware High-Performance Nonstick

Making the perfect pancake will turn into reality with this Farberware griddle-style pan. It has got a flat surface with a square shape design. And the cooking area is large enough for you to work your magic on the pan.

You shouldn’t have any complaints whatsoever about the material because it’s aluminum. It gives you even heating, and the thin construction just heats things much faster. For the non-stick interior, you get great textures on the surface that are functional and useful.

The handle on this is super comfortable to hold on to and doesn’t transfer heat, so you are safe all the time. It’s very easy to clean as you can clean this in a dishwasher as well. Need a pan to use in the oven? Well, this can serve that purpose too, as long as the temperature is 350F, it’s all good.

Pros

  • The pan is thin and lightweight, which makes it great for pancakes. 
  • You get proper and quick heat distribution from the pan. 
  • You can safely use this one in any oven within 350F.
  • The non-sticky surface comes with texture for easy flipping. 
  • The handle on this one is safe and comfortable to hold.

Cons

  • After some heavy cooking sessions, the pan can start flexing a bit.

5. CHEFMADE Crepe Pan Non-Stick Pancake Pan

CHEFMADE Crepe non stick pancake pan

Need a non-stick pan for pancakes? Well, then this is just the thing you are looking for. The design is all out for making pancakes and crepes. It has a circular shape for even heat distribution with a flat surface. And the lips are slightly raised, just what you would ask from a pancake pan.

This pan is made of high-grade aluminum and a stainless-steel bottom. So, with durability and resistance to scratch, you can’t go wrong with this one. That aluminum construction also gives it that thin and lightweight nature that works perfectly for making pancakes. Worried about warping? Well, it’s also warp-resistance so you can relax there.

Usability is where this pan excels at. It heats up quickly, so you don’t have to stand there for a long time to cook your pancakes anymore. It’s also super easy to clean, and the handle is just perfect for a comfortable grip.

Pros

  • It’s a lightweight and thin pan for making perfect pancakes. 
  • This one comes with durable and sturdy aluminum construction. 
  • You can clean this one in a dishwasher for ease of cleaning 
  • The pan heats up very quickly and evenly.
  • It has got a very comfortable grip on the handle with great insulation. 

Cons

  • It’s not suitable for cooking different dishes 
  • The pan can be small for a large quantity of food. 

6. Nordic Ware 2 Burner Griddle, Nordic 10230AMZ

Nordic Ware 10230AMZ 2 Burner Griddle

It doesn’t always need to look like a pan to make pancakes. This statement comes to mind when you look at this Nordic Ware 2 Burner Griddle. It is a griddle with the simplest of designs, doesn’t have any handles, and looks like a tray. And with the size of it, you can even make two pancakes at once.

For the construction, you will get a solid heavy-duty aluminum construction that gives you the certainty of durability for a longer time. As for the cooking surface, it’s obvious that you get a non-stick surface for making the best pancakes.

It’s a 2-burner pan so that you can get a lot of use out of it. It makes your cooking a lot faster with that extra space. You can clean this one up easily because of the non-stick surface.

Pros

  • It has got some simplistic designs 
  • The non-stick surface works very well
  • A larger surface area makes it easy to cook multiple items
  • You get durability from the cast aluminum construction 
  • It’s easy to clean up.

Cons

  • You may not even get heating on this. 
  • It is hard to manage without a handle. 

7. Norpro Nonstick Stuffed Pancake Pan

Norpro Nonstick Stuffed Pancake Pan

Now, this one is a specific pan for a specific dish which is the Danish pancakes or Aebleskiver. So, the design is a lot different than any other pan you have encountered. It has 7 circular holes where you will put the batter of your pancake. And if you want to make some Aebleskiver, this is the thing you will need.

While it’s for a specific dish, that doesn’t mean the pancake requirements change. It still serves the quick and proper heat distribution purpose with the cast aluminum construction. And it’s durable as well.  

As for usability, you can’t cook many items on this one rather than different Danish pancakes with different fills. And the non-stick surface on the pan makes it easy to clean, just like any other pan we discussed.

Pros

  • This is the perfect pan for making Danish pancakes. 
  • It has got a non-stick surface for easy cleanup and better pancakes. 
  • It’s a durable pan that will go on for years. 
  • The heat conduction on this one is fast and even. 
  • The handle always stays cool, so you won’t burn your hand. 

Cons

  • It only works for particular types of dishes.
  • It would have been great to have a lid included.

8. CucinaPro Unicorn Mini Pancake Pan

CucinaPro Unicorn Mini Pancake Pan

If you want to make your kids happy with pancakes, this is the easiest way to do so. It has 7 mold styles slots where you can just throw in the batter and make pancakes with some designs, features 7 different unicorn shapes that look very cute, and your kids will love them.

It has got that cast aluminum construction for proper heating throughout the pan. Also, it heats up quickly. The non-stick coating on the pan works the way it’s supposed to work. So, along with your kids, this will also satisfy your needs.

You might wonder if it will be hard to clean due to the molds. Well, no, it’s still easy because of the non-stick coating. You don’t need to put too much effort into cleaning at all.

Pros

  • It has 7 different mold designs for appealing pancakes.
  • You get great heat conduction throughout the pan. 
  • It’s super easy to clean because of the non-stick coating. 
  • The pan heats up quickly for some quick pancakes. 
  • The materials are durable enough to last for a long time.

Cons

  • It prints the unicorn only on one side. 
  • You can’t use this for any other purpose.

9. Evolution Reversible Non-Stick Family Griddle

Evolution Reversible Non-Stick Griddle

Looking for a pan to make some pancakes for the whole family? Well, this will satisfy your needs. The design is based on a double burner stove, making large pancakes in double the quantity. You can even use it as a grill pan; all you have to do is use the flipside of the pan.

Cast aluminum never goes wrong with cooking supplies, right? This one gets that even and quick heating from the cast aluminum construction. And the non-stick coating is always there to make flipping your pancakes more fun and easier.

The best part of this one is that you can use it for multiple purposes. It’s not just about making pancakes on this one; you can cook whatever you want with this. And the double burner compatibility just makes things so much better for the pan.

Pros

  • The compatibility with the double burner makes it versatile. 
  • A textured flipside makes it a grill pan as well as a griddle. 
  • This pan has great heat conduction ability. 
  • It’s easy to clean because of the non-stick coating.
  • You can cook large batches of pancakes very quickly.

Cons

  • The middle portion doesn’t receive heat
  • It’s hard to maneuver without any handles. 

10. Pancake Molds for Kids Mini Pancakes Maker

Pancake Molds Mini Pancakes Maker

We have another mini pancake pan for you to woo your kids into pancakes. It comes with some cute animal patterns on 7 different molds. The design is where all the attraction comes on this pan, and you will love it when you see it.

Even though the pan is design-based, it doesn’t lack sturdiness and durability. You get a cast-aluminum construction that works very well in distributing heat. And the double layer non-stick surface eases up the pancake-making process by a lot.

As for usability, you can easily clean this up because of the non-stick surface of the pan. The removable structure of the pan makes it usable in other scenarios as well.

Pros

  • It features 7 different cute animal pattern molds 
  • It’s sturdy and durable enough to last for a long time 
  • You will get good heat distribution from the cast aluminum 
  • The pan is easy to clean 
  • It serves multiple purposes with the removable structure

Cons

  • The handle is not good enough 
  • It may be hard to flip the pancakes at the beginning.

11. FRUITEAM Griddle Pan, Pancake Pan Nonstick 10 Inch Pancake Maker

FRUITEAM Nonstick Griddle Pan

Want to enjoy some small pancakes on a mold? Then go for this pancake maker. It has got the perfect round molds all ready for you. You get 7 molds for 7 pancakes with a perfectly round shape. It’s great for some light snacks in the evening or maybe a good morning breakfast. The color of this is very exceptional and looks good.

The material is cast aluminum which gives it that sturdiness you would love to have in a pan. And the proper heat distribution is just a bonus you get. As for non-stickiness, you won’t have any complaints with that aspect.

Using this is the most comforting thing you will do in your kitchen. The handle doesn’t get hot so you can hold it anytime you want. And the cleaning process is so simple that you won’t feel any hassle at all.

Pros

  • The sturdiness and durability will surely convince you.
  • It has got great heat distribution. 
  • The pan is easy to clean 
  • You will have no trouble touching the handle at any time 
  • 7 molds for making quick mini pancakes.

Cons

  • You have to cook in all the 7 molds to avoid dry burns
  • The bottom part scorches quickly.

12. Nordic Ware Scandinavian Silver Dollar Pancake Pan

Nordic Ware Scandinavian Silver Dollar Pancake Pan

Having some small pancakes in the evening can never be the wrong snack. And to enjoy that, you can get this 7-mold pan that is just perfect for making tiny pancakes. It has got a design that isn’t like most other pancake pans you see in the market.

Ever had a pan that warped after some use? Well, then get rid of that thought with this one. It will never warp because of the specialized cast-aluminum construction it has. The material also gives this the perfect heat distribution.

Non-stickiness you get in this pan will never disappoint you. Whether it’s flipping or cleaning, everything is just too easy on this one.

Pros

  • You can make 3-inch pancakes in the 7 molds. 
  • It’s a warp-resistant pan, and it’s also pretty sturdy. 
  • The heat distribution in this is commendable.
  • It’s easy to clean and use due to the non-stick surface
  • The handle is quite good on this one.

Cons

  • The coating may come off pretty early at times 
  • It’s not great for versatility

Ingredients into a pancake

Ingredients that go into a pancake are what make them so accessible and easy. You don’t need any fancy ingredients to make a standard pancake. Even the cooking process is super easy to follow.

Typically, you just add flour, baking powder, salt, sugar, egg, milk, and butter to a bowl. Mix them properly until they have a smooth texture. Then, heat some oil in a pan and pour the mixer with a spoon or scoop when the oil gets medium to high heat.

After cooking one side for a while, flip it over and cook the other side. Once both the sides are brown, you have got yourself some tasty pancakes. Isn’t it so simple? Want some extra taste? Well, you can pour some honey on top of your pancake to elevate the taste even further.

If you choose to go with different types of pancakes, you will have different ingredients and recipes. The basic process is pretty much the same; you may only need to add or replace some ingredients.

So, a question that always comes up is, how healthy are pancakes? What are its nutritional values?

On a single serving of a pancake with syrup and butter added, you get 260 calories. Here, fat is 7g, carbohydrates are 45.45g, and protein is 4.15g.

Because of the high carb property, pancakes have become a popular breakfast meal to give you energy throughout the day from those carbs. So, having two pancakes in the morning can get you going well for a long time.

How to test a Pan For Cooking Pancakes

If you are at a physical shop and buying a pan for making pancakes, you can check out these features to make sure it’s one of the best pans for cooking pancakes.

pancake pans with designs

Handle comfort: By handle comfort, we mean protection against heat. While cooking a big batch of pancakes, you will have to touch the handle quite a lot. So, your panhandle must be comfortable to hold. Also, make sure it’s not too hot. For that, you can always get a pan with handles that have a rubber or plastic layer on them.

Heat distribution: You would want a pan that can heat up quickly and distribute heat evenly for the perfect pancakes. To get that, you can simply look for a pan that is thinner than a usual frying pan and has a flat surface for proper heat distribution.

Non-stick surface: To test the non-stickiness of a pan, you can run your hands over a few times on the cooking surface. You should also check if the pan is PFOA coating-free or not. Also, avoid any pan that gives off chemical smells of any kind. All of these add up to the perfect nonstick pan for pancakes.

Flipping: You can’t test the flip without cooking on the pan. However, you can tell if the pan will flip the pancake properly or not by its shape. A flip-friendly pan will have a shape that is a bit shallow and has a certain angle to it. Also, a flat surface with non-stickiness is the ideal criteria for flipping pancakes.

Curved sides: Although this aspect contributes to the flipping part of a pancake pan, we still gave it a separate spot. Because it’s not necessary to have this feature, but if you get options, you should consider the curved side factor. With a curved side, you get a better flipping ability. This also makes the pan more versatile.

Versatile: Speaking of versatility, yes, you would want a pan that’s great for cooking pancakes. But if you can cook something other than pancakes on the pan, that wouldn’t harm you, right? If you have options for versatility, then you should go for it with no second thoughts.

Pancakes and cooking 

Even though pancakes are popularly known for being an easy and tasty dessert, you can eat them whenever you want. They are very easy to make and don’t require too much time, which makes them a great evening snack as well.

There are so many types of pancakes you can find going around the globe. Many countries have their specialty in pancakes. Some of the popular pancake types are-

  • English standard pancake
  • French crepes
  • American style pancakes
  • Scotch pancakes
  • Australian Pikelet
  • Korean Jeon

These don’t even begin to describe how many types of pancakes there are in the world. You can go through many of them and try them out. The best thing about all of them is they have a pretty similar cooking style with one or two exceptions.

To make the standard pancakes, you don’t need many things. For the tools, you will just need a large bowl, a pan, and a spoon or scoop. That’s it.

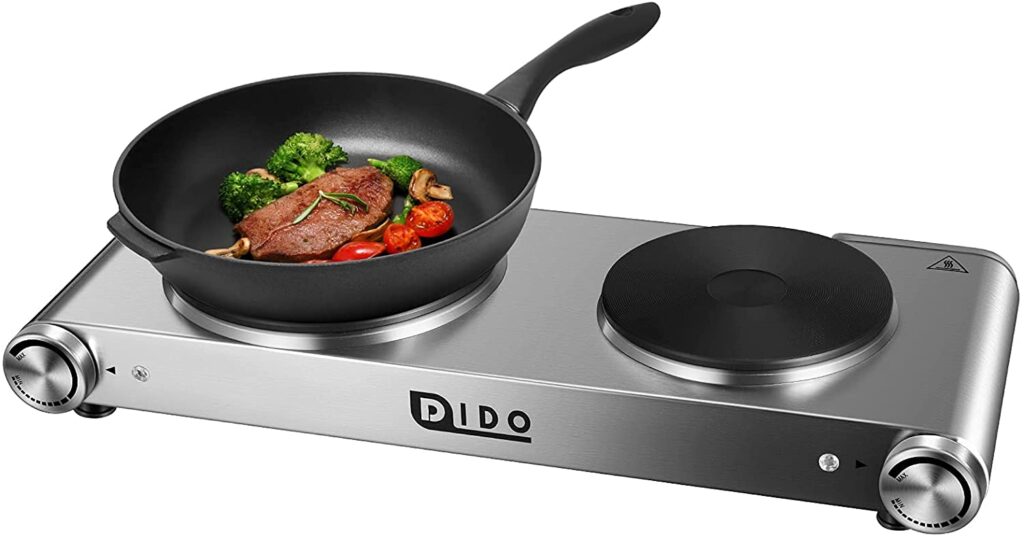
Electric pancake maker 

Well, if you don’t want to go through much hassle of pancake pan induction, stove or gas, then you can opt for an electric one. They aren’t the best option, but they are much more convenient. Also, they are much more expensive than regular pancake pans, so you have to consider that factor as well.

While all that is true, it’s also true that an electric pancake maker will make your life much easier. Especially if it’s from a quality brand, you will love the experience.

Conclusion 

All in all, you can see none of the pans we put together in this list lack quality and are quite similar in that aspect. The difference is with their functionality.

Some are great for cooking a lot of pancakes, like the double burner compatible ones. Then some options are great for making pancakes for kids. Some pans are suitable for making small or mini pancakes. While some of them are great for making regular pancakes.

We kept it like that, so you get to make a choice based on what you need. Overall, you now know a lot about the best pans for cooking pancakes so you can make your decision yourself. Hope to see you in some other query that we can help you out with.

12 Best hot plate for cast iron skillet- reviews 2021

0

Are you constantly out of space in your kitchen? Or maybe your kitchen gets too cramped to work in peace. Whatever the case is, you can save up a lot of your space with smart appliance choices. One of those choices is a hot plate for a cast-iron skillet.

Now, if you have no idea about this or are looking for the best hot plate for a cast iron skillet, then we are here to help. So, if you want to save up some valuable space in your kitchen, then this is the place to be. Let’s dive right in.

Quick comparison table

If you are in a hurry to buy, you can take a quick look at all the hot plates we lined up.

RankProductsTop features
1Techwood Hot Plate 1500W Portable Electric StoveCompact and lightweight
Temperature control
2CUKOR Electric Hot Plate CookerFast cooking
Decent power
3Elite Gourmet Countertop Electric Hot BurnerPortable
Affordable
4Cuisinart Cast Iron Single BurnerGood heat control
Decent power
5Ovente 1000W Hot Plate Electric Countertop Infrared StoveProper heat distribution
Lightweight
6CUKOR Electric Single Hot Plate Portable StoveCompact and portable
Heats up fast
7CUSIMAX Electric Hot PlateDurable and stylish
Excellent heating power
8CUSIMAX 1800W Double Hot Plate BurnerPacks great power
Very easy to clean
9Ovente 1700W Double Hot Plate Electric CountertopGood heat distribution
Has good power
10Techwood 1800W Electric Hot Plate StoveExcellent heat components
Modern and sleek
11Elite Gourmet Electric Double Buffet BurnerValue for moneyGreat
heat components
12DIDO 1800W Hot Plate Portable Electric StoveGreat build quality
Excellent heating

Are You looking Digital hot plate ? see amazon Review here


Are hot plates for Cast Iron Skillet safe to use?

We will be very honest, it’s common to worry about the safety of hot plates. In truth, it’s not the safest cooking option for you. As it’s an electrical cooking appliance, it has its safety concerns all the time. So, you have to be careful when you are using these plates.

Hot plate burner safety

Some things you can do for better safety is use tongs or oven mitts to grab the food. Because most of the time, a hot plate will be insanely hot, and you don’t want to burn your hand, right? Always use something to protect your hands as they will be close to the cooking source.

If you have a hot plate that allows cookware, you don’t have to worry too much about safety. Also, always make sure to unplug the hot plates after every use. And with these little safety measures, you can rest assured of using hot plates and saving space in your kitchen.

What pans can I use on a hot plate?

The kind of pans you can use on your hot plate depends on what type of hot plate you have. Different hot plates are compatible with different pans or pots. You can check out what kind of pots are allowed on your hot plate. This information comes with the instruction or manual.

Most of the time, the safest bet is to try out a cast iron pot or pan. You can try out different cast iron pans to use on a hot plate without any worries. Because it either works or doesn’t work, but it doesn’t damage in any way.

Besides that, you can go for stainless steel for induction-type hot plates. Usually, they have to be magnetic on the bottom to work with induction hot plates. With a magnetic bottom, some aluminum and copper cookware may also work.

Apart from all that, most stove heat-resistant pans will work on hot plates if it’s not an induction type.

Best Hot Plate For Cast Iron Skillet: Product reviews 

1. Duxtop Portable Induction Cooktop, Countertop Burner Induction Hot Plate with LCD Sensor Touch 1800 Watts, Black 9610LS BT-200DZ

For any couple or single person out there, this one can be the ultimate choice for a hot plate. It’s a single-burner hot plate, so you can cook food for one or two people with ease. And along with that, it’s super compact and lightweight for better convenience.

Coming to the power of the hot plate, it has got 1800 wattage. This kind of power is more than enough for cooking light to medium meals and maybe some heavy meals. It will cook food quicker than you can expect.

The best part about this one is the compatibility with most kinds of cookware. You don’t have to worry too much about using the wrong pots and pans. It goes along with aluminum, copper, cast iron, and even stainless-steel pans that aren’t truly magnetic.

Pros

  • It’s very easy to clean and maintain 
  • It has got enough power to cook light to medium meals
  • This one is a value for money product for sure. 
  • The temperature control works very well. 
  • It’s compact and lightweight so that you can move it around.

Cons

  • It may not be the best for heavy meals 
  • It doesn’t give the maximum 1500-watt potential

Check Price on Amazon

2. CUKOR Electric Hot Plate for Cooking

CUKOR 1500W Electric Hot Plate

If you are worried about the safety of using a hot plate, then this one will take away all your worries. From many different organizations, it has got the safety certification. So, you can rely on the safety and enjoy the benefits it provides you with that.

Cooking with this hot plate is as fast as cooking on a gas stove. It gives you the exact 1500-watt power that it features, which helps in getting better heat.

You won’t have to worry about the compatibility of your pans and pots with this one. It is compatible with almost any kind of cookware you may already have in your kitchen. And cooking with a cast-iron skillet is just too satisfying with this one.

Pros

  • Cleaning up this hot plate is very easy.
  • It works with most kinds of pots and pans. 
  • It packs up 1500w power for a faster cooking experience. 
  • This hot plate comes with certified safety measures. 
  • The heat output and control are admirable.
  • It’s portable so you can carry it wherever you go.

Cons

  • This one lacks a snap-on cover of metal. 

3. Elite Gourmet Countertop Electric Hot Burner

Elite Gourmet Countertop Electric Hot Burner

Going away from home for a while, but don’t like the food outside? Well, then take your cooker with you wherever you go with this Elite hot plate. Yes, the portability on this one is incomparable and lets you take this with you wherever you go.

While it’s small and all, it doesn’t lack in heating ability. You get proper and even heating throughout the hot plate, which ends up inconsistent cooking for every meal.

The whole thing becomes perfect when you take a look at the price. It’s so affordable that it’s worth buying multiple times. It can even be a great emergency cooking unit if you ever face difficulties with your actual cooking unit.

Pros

  • The super-compact nature of this one makes it a special hot plate. 
  • You get consistent and even heating throughout your cooking. 
  • This is a value for money product and worth a try for everyone. 
  • It works great as an emergency cooking unit.
  • It’s easy to clean.

Cons

  • This doesn’t have enough power for cooking heavy meals. 
  • It’s not the best for regular cooking. 

4. Cuisinart Cast Iron Single Burner

Cuisinart Cast-Iron Single Burner

Like enjoying some fried bacon in the backyard with friends? Then you will love owning one of these. First of all, it takes away the possibility of splattering grease all over your kitchen while frying bacon, as you will be outside. Secondly, it comes with several other benefits.

This burner is as quick as any stove cooker you have used or use currently. So, you don’t have to worry about taking too much time for cooking in this one instead of your regular cooker.

Also, it comes with accurate temperature control, so you get the perfect heat needed for the recipe. It has got 6 temperature adjustments that you can do using the dial on the front.

Pros

  • This one produces the true 1300-watt power that you would expect from it. 
  • Cooking on this hot plate is quick and consistent. 
  • This comes with 5 different heat control settings.
  • It’s portable, so you can carry it around if you have to. 
  • The size and power are enough to cook for a family of 3 to 4 every day.

Cons

  • This one lacks safety measures such as overheat protection. 
  • Cooking heavy meals isn’t the best bet on this one. 

5. Ovente 1000W Hot Plate Electric Countertop Infrared Stove

Ovente 1000W Hot Plate Electric Countertop Infrared Stove

If you don’t want to go to the induction route or metal coil route, infrared is your way. And this infrared hot plate will surely serve the purpose it’s meant to serve. You get a cooking experience that doesn’t involve any hassle.

Starting strong with the fact that you don’t need to worry about buying any special cookware when you have this. It’s compatible with most cookware out there. So, that’s a relief for you right there.

With infrared heating, you get consistent and even heat distribution which contributes a lot to tasty meals. And the best part is the portability of the hot plate, as you can just take it to your camping trips for cooking light meals.

Pros

  • You get even heat distribution due to infrared heating.
  • No need to worry about the compatibility of cookware.
  • The hot plate is slim and portable. 
  • It’s very easy to clean the hot plate. 
  • It doesn’t take too much time to heat up.

Cons

  • Not good for cooking heavy meals. 
  • It doesn’t come with many safety measures, so you have to be careful.

6. CUKOR Electric Single Hot Plate Portable Stove

CUKOR Electric Hot Plate Portable Stove

For all the travelers out there, this is a hot plate you should be aware of. It’s compact and portable enough to fit in a suitcase. So, when you are out in a different place, you can enjoy inexpensive homemade food in your hotel room by yourself.

Even though it’s so small, it doesn’t lack the cooking capability at all. You can still cook decent light to medium meals to fill your tummy every day on this one. It has got that infrared heating which distributes heat evenly and the 1200w power to cook fast.

You don’t need to have special cookware to cook on this hot plate either. Whether it’s aluminum, glass, or stainless steel, it goes with all kinds of cookware, eliminating a lot of trouble for you.

Pros

  • It’s so compact that it even fits in a suitcase. 
  • The heat distribution is even throughout the hot plate. 
  • It packs up enough power to cook decent meals for one. 
  • It’s compatible with all kinds of cookware. 
  • This one comes with excellent safety measures.

Cons

  • You can’t cook heavy meals on this.
  • You may face some electrical flaws after heavy usage. 

7. CUSIMAX Electric Hot Plate

CUSIMAX 1500W Electric Hot Plate

Does it matter to you how your kitchen looks? If it does, you will surely love to include this one to enhance the beauty of your kitchen. It has got some stylish and classy design that just makes the kitchen look nicer.

Looks aren’t the only good thing about this hot plate; it works tremendously well. You get an excellent heating component on this one that holds on to the heat for a while. It’s not only good for cooking fast but also keeps your food warm for a longer period.

Everything is just perfect for this hot plate. Even the build quality is sturdy and durable, and you can feel that instantly. Also, the safety measures on this one are commendable too.

Pros

  • Provides great heat control and distribution. 
  • It packs up enough power for cooking heavy meals. 
  • It’s quite compact and portable to move around. 
  • The build quality is super impressive. 
  • You can’t expect a better-looking hot plate than this one. 
  • Heats up a lot very fast. 

Cons

  • Not the thing for cooking a large number of meals.

8. CUSIMAX 1800W Double Hot Plate Burner

CUSIMAX 1800W Double Hot Plate

Short on time? Need to cook multiple foods at once? Then, go for the double burner hot plate like this one. Why specifically this? Well, this one comes with great heating power with several other features you would love to have.

First of all, the heat distribution on this hot plate is insanely good, and you will have a satisfying experience with it. It has enough power to cook a decent amount of food simultaneously on both the burners.

Next up is the precise temperature control you get on this one. Along with that comes the durability that is pretty rare in the hot plate scene. But with this one, you won’t have to worry about any of that. All of this makes it one of the best hot plates for cast iron skillet.

Pros

  • This comes with great durability on all the parts. 
  • The heat distribution on this hot plate is incredible. 
  • With precise temperature control, you get the exact temperature you want for cooking. 
  • It packs up enough power to cook multiple foods at a time.
  • This one is super easy to clean.
  • It’s portable, so you can take this in the backyard to have a good time with family and friends. 

Cons

  • The thermostat may face some issues after months of use.

9. Ovente 1700W Double Hot Plate Electric Countertop

Ovente 1700W Double Hot Plate Electric Countertop

If you require a cooker for emergency purposes or temporary cooking needs, this can be a great addition. It has enough power to prepare food for a family of 2 to 4 people with ease. And it’s better than a gas stove because of the low space requirement.

Coming to the burner and cooking facilities, it doesn’t lack any of it. You can get a good performance after the burners heat up properly. The heat distribution is great on this hot plate.

With the double burners, you can cook multiple foods at a time. This is a great time saver for you, so if you do a job or have a lot of work, this is a good hot plate you can get. And, the affordability makes it a worthy choice.

Pros

  • The heat distribution is proper and consistent on both the burners. 
  • It’s very affordable so you can save up some money as well. 
  • This one has the power to cook meals for a family of 2 to 4 people. 
  • It doesn’t require any assembly or set up for usage. 
  • The built quality of this hot plate is quite good

Cons

  • Burners on this hot plate take some time to heat up. 
  • The labels for the dials and knobs wash away after a while. 

10. Techwood 1800W Electric Hot Plate Stove

Techwood 1800W Electric Hot Plate

This is an example of a perfect double burner hot plate. Whether it’s performance, burner size, heating capacity, hot plate size, maintenance, there is no compromise. You get the very best of an electric hot plate on this one for the right value.

So, the perfection on this one comes from the fast heating component. It will heat up just like a gas stove within that same time frame, making it an efficient choice. And when you have the double burner with that kind of power, you can’t ask for more.

The hot plate is sleek in design, so it looks good. On top of that, it’s very easy to clean so you can retain good looks for a long time. Also, the overall performance is just top-notch; you won’t have any complaints with this one.

Pros

  • The hot plate heats up very fast and provides great heat distribution. 
  • With the double burners, you can get a lot of efficiency from this. 
  • It looks very modern and has a sleek design. 
  • The ease of cleaning makes it a very attractive choice. 
  • It has got excellent temperature control ability. 
  • It’s worth every penny you pay. 

Cons

  • Not the most durable hot plate.

11. Elite Gourmet Electric Double Buffet Burner

elite gourmet electric double buffet burner

Are you looking for an affordable double burner hot plate? Then, truly you can’t get a better deal than this. While it’s affordable, it does justice to the quality as well. And for any kind of urgent cooking need, this is the hot plate used for cast iron skillet you can always rely on.

You can get the same level of cooking experience as a gas stove while saving up a lot of space in the kitchen. And using the temperature controls, you can follow along with the recipe properly to make your food much more delicious.

Even if you cook on this one daily in the right amount multiple times, you won’t face any issues. It goes on without causing any problems while cooking or after cooking. And with the double burners, you won’t even have to worry about cooking multiple items.

Pros

  • This hot plate is the best affordable option available out there. 
  • You can rely on the power and heat components of this one.
  • The hot plate heats up very fast and does all the cooking properly. 
  • It has great temperature control and is very easy to use. 
  • This hot plate is straightforward to clean.
  • With the double burners, you get a lot of efficiency from this hot plate. 

Cons

  • I could have used more wattage for more power. 
  • It doesn’t have an overheat protective measure 

12. DIDO 1800W Hot Plate Portable Electric Stove

DIDO 1800W Hot Plate

If you don’t mind paying for good quality combined with some sleek design, then we have got just the thing for you. This hot plate has a silver design that just speaks out sleekness and doesn’t lack in quality one bit. So, all in all, you get a perfect hot plate that you have desired for a while.

Let’s talk about the healing abilities first. It has two burners with 900w power on each of them that provide even eating on both. And to control the temperature, you get two independent dials that give precise heat control.

Coming to its looks, you will love the full stainless-steel body look with the stove being cast iron. It’s stylish, modern, and looks classy throughout. And with all that, you get the added durability that many hot plates usually lack.

Pros

  • This hot plate is highly durable and stylishly inbuilt.
  • It comes with 1800w power combined on the dual burners. 
  • The temperature control on this one is accurate. 
  • You get perfect heat distribution in your cooking with this hot plate. 
  • It’s very easy to use and worthy. 

Cons

  • The knob placements aren’t excellent. 

Using Guides for best hot plate

Before you start using a hot plate, there are some things you have to look out for. Here are some things you should consider doing-

  • Don’t use any metal pan that can cause damage to your hot plate.
  • Always make sure to clean the bottom of the pan or pot, so it’s not wet.
  • Use the recommended cookware, or use cookware that has resistance to stove heat.
  • Keep away from using a hot plate if there is something flammable around. As you will possibly be in a cramped-up space, it can be very dangerous.
  • The most important thing to remember is never to take away the hot plate right away; let it cool down first.

Now that you are equipped with this knowledge, let’s move on to using a hot plate. With the best hot plate for cast iron skillet, you won’t have much trouble.

Using a hot plate 

  • First of all, you have to put the pan or pot you will be using on the hot plate.
  • Then plug in the hot plate and start it up. It’s essential to place the pot or pan on your hot plate before turning it on.
  • You just put the ingredients in and follow the recipe just like you would do in regular cooking. One thing to keep in mind is using some safety measures from the heat.
  • Once you are done cooking, you have to remove the pan and unplug the hot plate. Then, wait for a while to let the hot plate cool down.

That’s how you cook using a hot plate. As you can see, it’s not that hard. And with the best hot plate for cast iron skillet, you will get a great cooking experience.

How to Choose the best hot plate for cast iron skillet

Choose The Best Hot Plate

When you search for the best hot plate, you have to be aware of some considerations. You have to check in some factors before you buy a hot plate that works for your needs. So, let’s check out some things that you have to consider to make the wisest buying decision-

Size

The first thing to look at is the size of the hot plate. Well, you are considering buying a hot plate to save up space in the first place, so the obvious answer is looking for a smaller size here. Although that depends on what size your kitchen is, you should go for that if you can fit a larger hot plate.

You also have to count in the factor of the quantity you will be cooking every day. If you can’t even fit the food on your hot plate, then what’s the point of getting it. So, make sure it fulfills the quantity needed for your meal.

Hot plate for Cast Iron Skillet Burner Options 

Now, here is a factor that’s easy to decide. You get two options, either you get a one-burner hot plate or a two-burner hot plate. With a one-burner hotplate, you can cook a single dish at a time, and with a two-burner, you can cook two at once.

So, if you are cooking for yourself only, then maybe one burner is the way to go because it takes less space and is cheaper than a two-burner model. But if you want to save up some time and have to cook multiple dishes for a family meal, then two burners hotplate the choice for you.

Type of heating Hot Plate

Usually, you will get to see three types of heating elements in your hot plate. The heat comes through either coil, induction technology, or infrared lights. They differ in the amount and time of heat transfer to the pots and pans. This eventually determines how long it does take to cook.

We won’t go through many details for each type. For your convenience, we can assure you that you can’t go wrong with the induction type heating ever on hot plates. These are the type for the best hot plate for cast iron skillet.

They require cookware with a magnetic bottom to even heat the pan or pot. With the proper and compatible cookware, you can get excellent performance from an induction hot plate. However, these are the most expensive hot plates in the marketing; the reason should be obvious.

So, if you don’t need a hot plate for serious cooking or heavy cooking, you can go for a metal coil or infrared-type hot plate. Metal coil ones are the cheapest but lack quality and performance. In contrast, infrared ones are a little better and more expensive than the coils.

Power 

What we mean here by power is the wattage of your hot plate. You have to consider how much wattage works best for your needs. Usually, the wattage can go from 700 to1800 for regular hot plates. With a lower wattage, you will get less power using less energy.

For example, a 1000-watt hot plate can be decent for boiling water, frying eggs, or other light cooking. At the same time, an 1800-watt hot plate can do both light and heavy cooking with ease. But that just means it consumes more energy.

So, make sure to consider your needs; if you need the hot plate for regular day-to-day cooking, then go for a higher wattage.  If your purpose is to boil water or cook eggs and veggies every once in a while, then a lower wattage can also work for you.

Heat controlling ability 

Heat controlling ability

You can’t cook every food with the same temperature and heat. Different recipes require different kind of temperature control. So, you will need to look out for that aspect in your hot plate.

Does that mean you have to have this feature? Well, no, it’s only a necessity if you need it. If you want to cook different meals on your hot plate, you would want temperature control.

This will be the case for most people because they would want to cook various meals on a hot plate, so going for a hot plate with temperature control is always a great idea. Even though this might be a bit more expensive than a hot plate without any temperature control, it’s worth it.

Hot Plate Safety measure

Hot plates can be extremely dangerous if they lack the proper safety measures. One of the most crucial ones has to be protected against overheating. A hot plate getting too hot is not a rare case you may come across. And that’s normal. So, your hot plate must have protective measures against overheating.

A popular protective measure for such cases is that the hot plate will turn off if it reaches a certain temperature. This is to make sure the hot plate doesn’t reach that danger zone. Other than that, there are safety measures like child lock, non-slip pads, pan detection that make a hot plate extra safe.

So, when you are out there buying a hot plate, make sure you go through these considerations. These will help you determine the perfect course of action for getting the best hot plate for a cast-iron skillet.

Benefits of using a hot plate

Now, let’s get real here; what’s the point of all this and why should you get a hot plate? We will answer that question with the benefits of using a hot plate. This will clear all your doubts on whether you should get a hot plate or not.

  • The best reason to get a hot plate is to save up space. If you don’t have much space in your kitchen, then a hot plate is a better choice than a classic stove or cooktop.
  • As hot plates are electric, you don’t have to worry about any gas leak, which can be very lethal. However, hot plates do have their safety issues.
  • Using hot plates is just more convenient, as you can move them anywhere you want. You don’t have to be stuck in the kitchen because the gas line runs from there.
  • You don’t have to worry about smoke and fires with a hot plate because of its electric heat transfer.
  • Hot plates require less maintenance than a typical gas cooker which can be very helpful for you as well.

Well, these are the benefits. But if we were to nag about something, we would say hot plates are less efficient than a gas cooker. It takes more time to heat up and cook on a hot plate compared to a gas cooker. Other than that, both the cooking functions are pretty equal.

FAQ:

Here are some common questions people ask about hot plates-

Do hot plates use a lot of electricity?

Hot plates use the same energy as an electric stove. However, it takes longer to cook a dish on a hot plate. The average usage of a hot plate is 1200 watts an hour.

Will a hot plate boil water?

Hot plates are a great option for boiling water quickly. You can use induction-base cookware to boil water.

What is a good wattage for a hot plate?

The best wattage range for hot plates is around 750 to 1800. Within this range, you can get great cooking performance and efficiency out of a hot plate.

Can you fry food on a hot plate?

Yes, you can fry food like chicken, fish, vegetables quite easily on a hot plate. But it takes a bit more time than a traditional stove.

Can you leave a hot plate overnight?

You should never leave a hot plate overnight or even for a long duration. It can get incredibly hot and damage the hot plate, and may even cause deadly accidents.

What to check before using a hot plate for the first time?

Ensure to check any kind of external damage or cracks on a hot plate before you start using it. Also, check your cookware if it’s compatible with your hot plate or not.

Can you cook eggs on a hot plate?

Yes, you can cook eggs on a hot plate with a very simple method. Just place the pan and allow the plate to get hot. Then, put the egg on the pan and cook it the same way you would normally do. You can cover up the pan to retain heat and cook faster.

Conclusion 

All in all, getting a hot plate can be very helpful no matter what reason you are getting it. Whether it’s for small spaces or emergencies, they are worth it. And if you have a cast-iron skillet, then you can get one without any second thoughts about compatibility.

But when you choose to buy a hot plate, make sure to go for the best hot plate for a cast-iron skillet. Because with the wrong ones, you will never understand the true value of a hot plate. So, we tried to bring you all the best ones we could find out there.

As you have already seen, there are various options you can try out. We kept single burners, double burners, premium choices, affordable choices, and whatnot. One thing we can assure you is the great quality of all the hot plates we listed. And to help you make a choice, we included the buying guide as well. I hope this helps you in your endeavor to buy a hot plate.

The Best Way to Reheat Pork Chops

0

Pork Chops has become comprehensively prevalent as an amazing food item across the globe because of its delicious and mouth-watering taste. Phenomenally a pork chop refers to any of the cuts of the pig perpendicular to the spine and it keeps us very vivid and energetic by delivering iron, potassium and other required nutrients while being about as lean as chicken and mutton. in this session, you will learn to choose what is the Best Way To Reheat Pork Chops for you in your situation.

Pork Chops

 People nowadays are remarkably adored in pork chops as high-fat foods can be high in calories and lead to weight gain, but a broiled pork chop has only 4 grams of fat compared with 13.5 grams in a T-bone steak that can make you more revived. 

It is familiar that some cuts of pork chops can be high in cholesterol-raising saturated fat and calories, but a lean pork chop, such as a sirloin or top loin chop, is the basis for a healthy and reasonable meal. In this present phenomenon of the food industry, it’s very pivotal to obtain protein, zinc, calcium, iron, phosphorus, niacin, selenium etc. from a single source of a food item and in this regard, the pork chop is the most preferable item I reckon.

Pork chops also contain Selenium-dependent enzymes that support muscle and blood vessel function and aid in producing thyroid hormones. Here I will try my level best to discuss some ecstatic way to reheat pork chops. 

Reheating Pork Chops in Oven

Pork chops in oven

It is tremendously preferable to reheat the pork chops using the oven as it is mostly absolute and precisely the oven surrounds the chops from the top, sides, and bottom, allowing them to reheat thoroughly and efficiently. 

You must have to ensure the meat won’t be overcooked by keeping them covered the entire time preferably.

You can reheat at 176° C and then remove the leftover chops from the fridge and place them in a glass baking dish. In a prepared dish that is covered with aluminium foil, cooked pork chops are kept for 15 minutes to reheat depending on the thickness of the chops. 

You can use an instant-read thermometer to check the temperature of cooked pork chops. Be conscious that leftover meat should be reheated to an internal temperature. 

Finally, you have to remove the pork chops from the oven and serve them while they’re hot as this process is largely hands-off, you can prepare a simple side dish or two while the chops are heating up accordingly. The thing that you have to keep in mind is to pour the sauce into a baking pan. It can be anything from plain water or meat broth. It is not a matter to mention what it is, as long as it’s liquid, as it will restrict the meat from drying out.

Pork Chops in Instant-Pot

I believe that I am incredibly graced having my instant pot as I can do many things with that like reheating pork chops deliberately. To make steam, add some water to the bottom of the insert pot of Instant Pot. After placing the pork chops inside the pot, you have to add just enough broth or water to moisten the meat without soaking it. 

For frozen pork chops in an instant pot, additional liquid isn’t really necessary, since the ice is bound to melt anyway, but if you want to add flavour, pour some beef, chicken, pork chops etc. Using the steam function can keep the temperature low and allow for slow heating. 

Generally, it may require 5-10 minutes to reheat and cook and then check the inner temperature of the pork chops with a food thermometer. If it’s 165°F or higher, they’re safe to eat without facing any troubles. The thing that I want to add additionally here is that instant pot is extremely quick. It is easy to use, almost as quick as the microwave, and with far better results.

Pork Chops in Microwave

Pork chops in microwave

Reheating the pork chops using the microwave is still now a phenomenal and outstanding method when you’re crunched for time. 

Most microwaves nowadays have a dedicated defrost setting. So you can defrost your pork chops from the freezer and reheat them soon after using the same appliance. This is why people prefer the microwave. If you want to reheat pork chops, you have to use a microwave and place the pork chops on a single layer, avoid overlapping and try to leave a little space between them. 

Then set the microwave on medium heat after damp a paper towel and cover the plate with it. Reheat the pork chops in the microwave for 30 seconds and if they are still cold, then reheat. Make sure of the internal temperature with a food thermometer. If it’s 165°F or higher, the pork chops are reliable and ready to serve. 

The things that should be kept in your mind that reheat pork chops in the microwave, make sure the machine is set to 50 per cent power. If the power setting is any higher, it will result in dried-out meat that matches shoe leather instead of dinner.

How Long Does Pork Chops Last

Most prominently, 

  • Cooked pork chops last for 7 days in the refrigerator and 6-8 months in the freezer. On the contrary, 
  • Fresh pork chops last for 1-2 days and 6-8 months in the freezer. 

I want to share here some tips with you regarding the storage of pork chops for a longer period of time. 

  • After pork chops are purchased with reasonable bucks, they may be refrigerated for 3 to 5 days – the “sell-by” date on the package may expire during that storage time, but the pork chops will remain safe and edible to use after the sell-by date if they have been properly stored.
  • Bacteria grow swiftly at temperatures between 40 °F and 140 °F; pork chops should be abandoned if left out for more than 2 hours at room temperature.
  • The freezer time shown is for best quality only. Pork chops that have been kept constantly frozen at 0°F will keep protected indefinitely to retain the taste.
  • The best way is to smell and look at the pork chops. Signs of bad pork chops are a sour odour and a slimy texture; discard any pork chops with an off smell or appearance, do not taste them first without taking any protective measures.

how to moisten dry pork chops

It is indeed a very spectacular way to reheat the pork chops. It enables you to carve it into very thin slices before pan-searing it with a bit of butter. When the pork is sizzling hot, add a splash of full-flavoured broth or soy sauce. In this method, you need a skillet large enough to fit the pork chops to proceed to add water. Cover and simmer until the pork is hot, flipping at the three-minute mark after placing the pork chops in the skillet. You have to add more liquid if it is getting absorbed. Pork is ready when it waives an internal temperature of 165 degrees F.

The Telling that Can Say the Pork Chops Are Bad 

You can depict pork chops gone bad by reading its color. 

Predominantly, after thawing the pork chops, check whether it is still coloured light pink or white. If so, then it is still fresh or edible. 

But if the pork has turned grey or black, then it has surely gone bad. 

If pork chops begin to decay, the meat darkens and turns grey badly. 

When working out how to tell if pork is worse after cooking, the sour odour will persist and intensify. In this instance, we should keep in mind that fresh pork chops are light pink to white.

 If the pork chops are grey or brown, they have started to rot.

Side Effects of Pork Chops

  • Pork chops are the reason behind many heart diseases like stroke, angina pectoris, myocardial infarction etc. 
  • It is also responsible for blood, skin, stomach, liver etc. cancer. 
  • Hepatitis E is caused due to the persistent presence of pork chop in the body. 
  • Pork chops contain several types of parasites like Taenia solium that can infect humans.
  • Pork chops can also be high in sodium and saturated fats that should be avoided as part of a healthy diet. 

Conclusion

Compared to other pork food items, pork chops have been found beneficial and reliable. It’s a very remarkable and rich source of high-quality protein, as well as various vitamins and minerals. So, it may improve exercise performance and promote muscle growth and maintenance. 

A number of scientific studies show that pork chops contain the amino acid beta-alanine. It helps your body form a compound called carnosine. Carnosine is important for muscle function.  A three-ounce pork chop provides twenty-five per cent of the recommended daily intake of vitamin B12, thirty-eight per cent of vitamin B6 and forty-five per cent of niacin. But we should avoid repeated consumption of pork chop that may lead us to a very bizarre condition.

Does Oat Milk Need to be Refrigerated- see what’s more

0

Non-dairy milk or oat milk is considered a good beverage to use in cooking as well as for coffee. It keeps a good amount of calories and proteins as compared to other milk alternatives including almond milk, soy milk, banana milk, and many others. It’s confusing to know the answer to the question Does Oat Milk Need To Be Refrigerated. It just needs two basic ingredients to make it, water and oats. All other additional ingredients are used to make it tasty.

Oat milk

Oat milk does not always need to be refrigerated. Before opening the shelf-stable carton, it can be placed in a cold and dry place. After its opening, it needs proper refrigeration. Once you open its seal then don’t keep it in the room. It’ll spoil if you keep it for more than two hours outside the fridge.

We’ve covered all the important concerns in this article including does oat milk need to be refrigerated or how long does oat milk last in the fridge and many others. So, keep reading

What is oat milk?

Oat milk is plant-based milk that uses whole oat grains to blend with water. With oatmeal-like flavor, it is also used to manufacture in different flavors including vanilla and chocolate. 

All of its flavors have creamy textures. And the best thing is no need to add many ingredients in oatmeal to get creamier textures. You can also call it a popular alternative to cow’s milk which can come in its creamier form after adding water and some additional ingredients.

Ingredients needed to make oat milk

There are two basic ingredients needed for making oat milk:

  • 1 cup rolled oats
  • 4 cups of water

Here are some additional ingredients you can add to get flavorful and creamy oat milk:

  • Sea salt 
  • A date
  • Vanilla extract
  • Cacao powder
  • Berries 

HOW TO MAKE OAT MILK? Well, it’s not tough to make oat milk. Add 1 cup of rolled oats and 4 cups of water to the high-speed mixer. Blend them for 40-50 seconds and then use a clean T-Shirt or towel for the straining process.

To get additional flavors add Sea salt, a date, Vanilla extract, Cacao powder, and Berries during blending.

How long does it last?

Once you open the oat milk container it’ll last for 7-10 days in the fridge as it has a shorter window to remain fresh. After this period you can inspect, smell, see or taste to know whether it is spoiled or not. If not, then use it and if it feels spoiled then toss it out.

In case if you want to store a sealed oat milk container, then storing a sealed one is easier than an open one. An area of the home with a stable temperature can maintain the oat milk’s freshness for as long as up to nine months.

Unopened oat milk shelf life?

The shelf life of unopened oat milk depends upon the temperature of the place where you’ve placed it. A stable temperature can maintain its freshness for up to nine months.

In case if you need to store it for more than one year then you must use a cool, dry room with a few lighting systems. This is to save it from the heat of lights and different weather conditions especially in summer. Unopened oat milk stored effectively able to last for three to five years

How long does it last after opening?

The oat milk indeed can last for 4-7 days after opening. And if you place it in the fridge with appropriate coldness then it can last for 7-10 days. 

But if it seems then it’s good to drink it within 4 days of opening. Try not to use it after 4 days of opening according to the “SELL BY” date on your bottle.

Does oat milk need to be refrigerated?

Does oat milk need to be refrigerated? After opening oat milk it needs to be refrigerated, but even the refrigeration varies like brands. Oat milk able to shelf-stable also needs refrigeration but after opening. Before you open it, if oat milk has airtight seal packaging then you can store it in your pantry safely. 

Refrigerated Oat Milk

Of course, after knowing this, your intuitions will prefer you to buy shelf-stable oat milk. So you can use it for up to 7 days of opening. And in case you’ve left your milk on the table because it’s shelf-stable. Then it’s a very bad idea because as long as you’ll not refrigerate it, the chances are high that it might spoil within a few hours.

According to the US Food and Drug Administration, the refrigerated abled foods and beverages including milk should never be out of refrigeration at room temperature for more than two hours. So it simply says that you can’t keep oat milk at a temperature above 900 F.

Can you freeze oat milk?

Oat milk can freeze and the best thing is you can use it in tea, coffee, or cereal. After freezing this, it’s able to be used for up to 2 months. When you freeze it, it feels a little graininess but after passing out from the heating process, it doesn’t feel graininess. So you can use this oat milk in cooking. 

HOW TO FREEZE OAT MILK? For this instance, you can use an ice-cube tray. Because they’re pre-portioned as cubes, you’ll not need to break it into pieces or defrost it. And you can directly use it in sauces, cooking, and smoothing.

Benefits and Side Effects

Benefits Side effects 
  People with dietary restrictions can use oat milk as it is just made with oats and water. Oats are naturally gluten-free and free of nuts, soy, and lactose as well. Oat milk provides vitamins B which are essential for optimal health and have a great connection with numerous benefits. One study has found that drinking 3 cups of oat milk daily for 5 weeks reduces the blood cholesterol by 3-4%. Oat milk also makes your bones strong as it is fortified with calcium and vitamin D.   Oat milk contains natural as well as added sugars which can be bad for health in some aspects. Oats are gluten-free naturally but a lot of oats are used to process in shared equipment. So not always but sometimes they’re contaminated as gluten beverages. If it seems then most of the ingredients in oat milk contain canola or rapeseed oil which can cause a highly inflammatory issue. Oat milk contains fewer nutrients than cow milk. Moreover, commercial brands add vitamins and minerals but if you’re making this at home then you’ll be unable to do this.

Benefits for Skin

 If you’re feeling that your oat milk has become spoiled then instead of throwing it you can use it for your skin treatment. With a delicious taste, the grain-derived milk also offers many beauty and skincare benefits when infused into skincare products. 

Here we’ve mentioned some important benefits which can derive from oat milk:

  • Oat milk is a good antioxidant that takes care of your skin from daily wear and tears and also reduces pigmentations, wrinkles, and acne flare-ups. It makes your skin glowing.
  • Oat milk contain potential skincare benefits and able to use as the treatment for inflammatory skin conditions such as eczema
  • Colloidal oatmeal has been approved as a skin protectant and able to decrease water loss from the skin.

If you’re worried about skin allergies or certain types of skin problems. Then instead to use commercially available oat milk the finely ground oats are recommended to use for reducing skin problems.

Oat milk calories per cup

The water and oats blending this grain-derived beverage are considered too rich in fibers. Also, it’s considered high in carbohydrates as compared to other milk alternatives. As it doesn’t contain saturated fats and provides an appropriate amount of carbohydrates, oat milk makes the human body able to last energy throughout the day.

If we’re talking about how much a cup of oat milk contains calories then a cup of oat milk able to provide:

Oat Milk Calories
  • 130 calories
  • 15gm carbohydrates 
  • 2.5 grams of fat
  • 0 gram of saturated fats
  • 2 grams of fibres
  • 4 grams of proteins
  • 35% of daily calcium
  • 25% of daily vitamin D

There is no doubt that oat milk has fewer proteins than natural cow milk. But it contains much protein as compared to other plant-based milk alternatives including almond, coconut, and rice milk.

Oat milk Disadvantages

There is no doubt that people use oat milk as a special diet and also it is considered a vegan-friendly beverage. The big reason to consider it in diet plans is that it contains certain types of nutrients which are high in it as compared to other plant-based milk alternatives.

When we hear the name oat milk, a sweet and creamy image comes into our mind. But with its lot of benefits it also has some negative points which are:

  • It may contain a high amount of sugars and preservatives as the brands used to add sugars during the production process to increase taste and shelf life.
  • Oats are naturally gluten-free but they may be used to process in the same facilities as gluten-containing products. So there is a chance of gluten addition in oat milk during the manufacturing process.
  • It’s a good alternative as compared to other brands. But as it contains 130 calories and 25 grams of carbohydrates so, in this case, it’s not a good alternative as milk for babies and children.

Does oat milk cause gas?

Is that oat milk dangerous or can cause gas? Well, oat milk is known for its lot of advantages but people with celiac disease or gluten intolerance should not use it. As it contains a high level of sugars.

Moreover, oat milk can cause an upset stomach because of sugar and fiber items in it. This is not good for people having stomach issues. For such people the results occur in the form of gas, bloating, burping, or stomach pain.

Can oat milk cause constipation?

Because of the good amount of fibres in oat milk, it offers relief from constipation and prevents haemorrhoids. It may also help to reduce the death chances because of colorectal cancer.

Whether it’s dairy or plant-based milk, they all help to improve the digestion system. Oat milk is high in beta-glucans which helps for maintaining good heart health. The gel-like substance inside your gut can bind to cholesterol and reduce its absorption. When the appropriate amount of cholesterol stays in the body then it also helps to maintain the digestive system.

Can oat milk cause bloating?

As bloating also comes in the stomach issues head, so yes, oat milk can cause bloating or stomach problems. It takes time for side effects to appear in the form of bad symptoms in your body. 

In case if you’ve started to use oat milk or eat oats repeatedly then these symptoms may become chronic. These symptoms appear in the form of stomach problems including bloating and burping.

How long does homemade oat milk last?

 Homemade Oat Milk

Oat milk from commercial stores can last for 4-7 days and with proper refrigerating, it can last for 7-10 days. The milk from stores is sealed and tied to stop the air in and out. This sealing makes it able to last for 7-10 days.

However, homemade oat milk has a different count as compared to commercial oat milk. Of course, it’s not possible to seal it like stores, but even then if you seal it in a good manner then it can last for 5 days. To know whether it’s gone bad or not you can smell or taste it.

How long does oat milk last in the fridge?

Oat milk can last for 7-10 days after opening if it is stored in the refrigerator properly. Even in case if you stored below 40 degrees Fahrenheit it can last for up to 14 days. After opening, it can last at any time whether before or after the “sell by” date. So to know the freshness try to see its color or taste its flavor.

How to tell if oat milk is bad?

If you are starting to drink oat milk and pour it into the glass. Then look for these recommended symptoms before drinking which usually appears in the case of spoiled oat milk: 

  • If you’re having difficulty pouring it or it has a thick and not smooth texture then throw it out.
  • Oat milk usually has a creamy white color. If it is representing a different color than white, it means it has reached its last point.
  • Normally, non-dairy milk does not smell sour, if so, then it’s a sign of spoilage.
  • If the carton has passed its “sell by” date or you’re opening it in 10-12 days, then it’s time to let it go.
Summary
  Keep a shelf-stable carton in the pantry and after opening allows it a proper refrigerating Fahrenheit below 40 degrees. To keep shelf-stable oat milk safe for more than 9 months, store it in a room that is cold, dark, and able to provide a stable temperature. After opening, try to finish it within 4-7 days. And always keep it in the fridge. If you’ve homemade oat milk then try to use it within 5 days of making it. Spoil oat milk if it is thick, hard to pour, smells bad, or has been stored for a long time.

How to Reheat Oatmeal: The ultimate Guidance!

0

Oatmeal is a popular breakfast option. It is a mood in the morning, not just because it is simple to prepare. If you’ve ever wondered how to reheat oatmeal, we’ve put up a handy guide to teach you the best methods to do it.

It’s critical to understand how you should reheat oatmeal as you can’t eat cold. Furthermore, it is always vital to eat warm meals to reduce the risk of food poisoning pursuant to food safety rules.

When it comes to breakfast, we are typically in a rush. We can’t afford to be late! So there you have it, some of the easy methods to reheat your oatmeal! The many techniques for reheating oatmeal will be emphasized as well, so you can test them out the next time you cook oatmeal.

Health Benefits of Oatmeal

Oatmeal is full of fiber and nutritional value. They are good for losing weight, and keeping you energized throughout the day. Some other health benefits of oatmeal are-

  • Oats are full of antioxidants
  • Increases the growth of helpful bacteria in your stomach
  • Helps to reduce cholesterol level
  • Helps to reduce blood sugar
  • Prevents colon cancer and heart disease
  • Doesn’t contain any gluten
  • Helps to reduce the risk of asthma
  • Full of essential minerals and vitamins.

Is It Okay to Reheat Oatmeal?

For a lot of people, oatmeal is a common breakfast option. Simple and unpleasant on the surface, but with the correct additions of syrups or fruits, the simplest porridge transforms into a wonderful breakfast.

Reheat Oatmeal

But what if you’ve prepared too much food for the day? Or perhaps you’d want to prepare some oatmeal ahead of time?

Based on the oats you use, cooking oatmeal might take up to 25 minutes. Not everyone has the time in the morning to do it. However, there is some good news for busy oatmeal fans. It may be prepared once and then reheated for a few days.

It won’t take long to reheat oatmeal. Even so, you’ll get a delicious and nutritious meal to help you through the day. It is okay to reheat heated oatmeal as long as it has not been left out overnight.

It is a common misperception that food that doesn’t have animal products would last longer. As a result, many people believe that putting warm porridge out on the counter till morning would not ruin it.

So, yes, it is okay to reheat oatmeal. Just don’t leave cooked oatmeal out overnight. If the oats contain any germs, allowing them to live their best lives all night will result in health problems.

Everything You Need to Know about How to Reheat Oatmeal

We’ve already made a verdict that reheating oatmeal is absolutely fine. But, there are some factors that you need to consider and some questions that you need to have answered. Bear with us to know everything about reheating oatmeal.

Can You Make Oatmeal in Advance?

Porridge (oatmeal) can be made in advance and reheated in the microwave in the morning. We recommend using regular rolled porridge oats rather than the coarser “Old Fashioned” oats. If you just want to make one dish ahead of time, combine the oats with the amount of liquid required and let it soak overnight in a microwaveable container in the fridge.

The porridge may be frozen for up to 3 months. Microwave the porridge until it’s steaming hot, then stir thoroughly before eating, adding more liquid if required.

How Long Should You Reheat Oatmeal?

Microwave the oats in high power till you boil in the next morning, then cook for an additional 20-30 seconds. Before eating, give it a good stir and thin it down with a bit more milk or water if it’s too thick. If you’re cooking on the stove, pour the soaked oats into a pot and heat until boiling, stirring regularly.

If you wish to create a bigger batch, combine the liquid and oats in a pot, bring to a boil, and then reduce to low heat for 3 minutes. Cool completely before dividing into parts and storing each part in an airtight container.

Can You Reheat Baked Oatmeal?

Yes, you definitely can reheat baked oatmeal. The best oats for baking are regular rolled oats. Over quick or steel-cut oats, we recommend them for baked oatmeal.

Reheating Baked Oatmeal

Baked oatmeal with apples, which can be made ahead of time, is sweet, hearty, and delightful when served with warm milk. It gives it a more upscale vibe as if it were a complete dinner.

Baked oatmeal is a hearty breakfast that will keep your kids satisfied until lunchtime. To make this baked oatmeal even more full and healthful, cover it with milk.

After being carefully kept in the fridge, you can either warm baked oatmeal in the microwave or on the stove. Microwaving your favorite oatmeal is easier rather than cooking it on the stove. Just make sure you do it correctly or you’ll wind up with sticky oatmeal.

Microwave the baked oatmeal for 45-60 seconds in separate bowls. After that, pour the milk on cooked oats. Baked oats can also be reheated in a pan with some milk. Heat it up on moderate heat till it’s warm all the way through.

Does Reheating Change Oatmeal’s Texture?

Yes, oatmeal will change texture after you reheat it. The oatmeal will be a bit thicker when it remains at a cold temperature and absorbs the remaining moisture. As it heats up, this will start getting softer.

When pre-cooked oatmeal is soaked in water or milk, it continues to absorb the liquid. It gets soggy and mushy as a result of this. So, when you reheat oatmeal, you should add water or milk while bringing it to a boil.

How Long Can You Keep Oatmeal in the Fridge?

Refrigerate cooked oats in sealed containers to extend its shelf life. Cooked oats will stay in the refrigerator for 4 to 6 days if refrigerated properly. Bacteria grow quickly at 140°F and 40°F. So, oatmeal that has been left out at room temperature for 2 hours or more should be removed. The best method is to smell and examine the oats. Reject any oatmeal that has an odd odor or appearance.

Can You Freeze Oatmeal?

Yes, you can reheat oatmeal. You can freeze individual servings of oats in muffin moulds and keep them in the freezer if you prepare a large quantity (we suggest steel cut since it’s so wonderful, but rolled works too). When you’re ready for breakfast in the morning, simply reheat them.

How To Store Cooked Oatmeal For Weeks

The first step in storing bulk oatmeal is to remove oxygen and put them within an airtight container. Prepare oatmeal in a big batch and store it for the whole week. Do this on a Sunday night which is quite logical. Divide the oats in five separate jars for each day of the week. This is an excellent activity to do in the afternoon, possibly while preparing supper.

Simply prepare the oats and place them in jars. Bring the oats and water to a boiling temperature, and then cover and remove from the heat. Reheat them up in the morning after they’ve been left overnight.

Best Ways to Reheat Oatmeal

There are several ways you can reheat oatmeal. Let’s explore some of the easiest among them.

Can You Reheat Oatmeal on a Stove?

You can reheat oatmeal on a stove following some simple steps. Your delicious and nutritious breakfast will be ready in no time!

  • Get a pan and keep the oatmeal in it
  • For adding a bit moisture, add some milk or water as per your preference
  • In medium temperature, warm up the oatmeal for 1-2 minutes
  • Keep stirring it when it’s being heated
  • To make the oatmeal smoother, add some more milk
  • Turn the stove off, and voila! Your delicious breakfast is done.

Can You Reheat Oatmeal in a Microwave

Oatmeal in Microwave

Reheating oatmeal in a microwave is easier than using a stovetop. While some people might prefer the stove, go through the following steps for reheating oatmeal in a microwave if you’re more like a microwave person.

  • Store the oatmeal in a bowl that is safe for microwave
  • Add some milk or water if you want it to be creamier
  • Make sure to cover the mixture and keep it in the microwave
  • Heat up it for 30 seconds, and take it out
  • Stir for a few seconds and put it in the microwave again
  • Heat the oatmeal again, and keep repeating the process until the meal is warm and ready

How to Reheat Oatmeal without a Microwave

For reheating oatmeal without a microwave, there are several ways that you can follow. You could just use an oven with radiant heat and convection. However, if you want the oven to function faster, you need an extremely hot oven, such as a commercial pizza oven, that’s very hot when you put the oats in. It isn’t feasible in the majority of homes.

Water would be the most useful liquid for this, and it may reach a maximum temperature of 100 degrees Celsius. You’d have to use oil if you want to utilize a liquid that could be heated to greater degrees. However, you’d be deep-frying the oatmeal. And it not only looks dirty but also significantly alters the flavor.

Use a pot made of cast iron or steel. In a large saucepan, combine the cereal and a large amount of water. To break up clumps, keep stirring the mixture.

A potato masher or a bamboo spoon would work nicely for slicing up the pieces. Increase the temperature to medium-low. With a wooden spoon, stir the mixture constantly.

While you reheat, keep adding water as much as you need. If there is too much water in the oatmeal, let it simmer with the cover off so that the extra water may evaporate. Lower the heat and cover the oatmeal when it reaches the appropriate temperature.

How to Reheat Oatmeal on Stove?

Reheating oatmeal using an oven takes more time than a microwave or stovetop. But, you can still do it and have a delicious breakfast.

Get an oven-safe dish, and keep the oatmeal in it. Add some milk or water, and bake it at 400 degrees for around 15 minutes. Make sure to cover the dish with foil.

If you can bake it correctly, oven-baked oatmeal will have a delicious crust. The topping will also be toasted which will give a mouth-watering flavor.

Can You Reheat Instant Oatmeal?

Yes, you can reheat instant oatmeal and have a delicious breakfast within minutes! You can reheat instant oatmeal just as you would the usual oatmeal. If you’re using a stove, put a saucepan on top of the stove, and keep the oatmeal in it. Add some milk or water, and stir it while heating.

If you’re using a microwave, use a microwave-safe bowl and warm up the instant oatmeal for 25-30 seconds. Add some milk or water and heat it again. Make sure to stir the mixture before you put it back in the microwave. Keep doing it for 2-3 times until it’s ready to consume.

Reheating Overnight Oats

Overnight oatmeal is a way of softening oats by soaking them in a liquid, generally milk, and overnight. Unlike typical oatmeal, there is no need to boil it. While overnight oats may be eaten warm, most people prefer them cold straight from the fridge. They’re an excellent substitute for an on-the-go breakfast choice. Nuts, fruits, and other mix-ins are commonly added to overnight oats to provide taste and texture.

Overnight Oats

Overnight oats are supposed to be eaten cold. But if you prefer them warm, just heat them up on a stove or microwave for 1-2 minutes like regular oatmeal.

Now, you might wonder why you should go through the hassle of soaking overnight oatmeal instead of having almost-ready instant oatmeal. Have a look at the following reasons to why you should consume overnight oatmeal:

  • You don’t have to prepare them in the morning
  • You can have them cold, so no need to use extra dishes for stirring
  • Additional foods can be added and that will not make the mixture sticky
  • Instant oatmeal has some additives that might be harmful which are absent here
  • You can prepare different jars with different flavors for each day of the week.

FAQ (Frequently Asked Questions)

  • Can you reheat steel cut oats?

Steel-cut oats are easily customizable and perfect for storing. You can definitely reheat steel-cut oatmeal!

Make large oatmeal for the whole week, and store them in the refrigerator in sealed bags or jars. You can even store them for a month if you store them in small portions. If you’re reheating steel cut oats on stovetops, keep heating it at medium temperature, and stir it until it gets ready. Add milk or water for thinning out the oats.

You can reheat Little portions of steel-cut oatmeal using a microwave. In a microwave, you have to heat the oats in high power. Just like regular oatmeal, heat the steel-cut oatmeal for 30 seconds, bring it out and add liquids, and heat it up again. Keep doing it until the meal is ready.

  • Can you reheat instant oatmeal?

Instant oatmeal is a popular breakfast item in a lot of households. Just like regular oatmeal, you can reheat instant oatmeal using a stovetop or a microwave. Follow the same steps of reheating regular oatmeal in this case as well.

  • Is instant oatmeal bad for health?

Instant oatmeal is partly cooked for quicker preparation. Instant oats, contrary to common assumption, have the same nutritional advantages as normal oats. The added sugar for extra flavor might be a concern for some people. But, that’s nothing that would make them too bad for health. Some companies may use salt as a preservative, although there are some ones that do not. If you pick unsweetened instant ones, they will be both convenient and good for your health.

  • Can you eat oatmeal with cold water?

Yes, you can definitely eat oatmeal with cold water. But, you can’t prepare it in minutes like heated oatmeal. As the heat softens the oatmeal in minutes, it becomes edible within a short time. With cold water, that will take some more time. You have to soak the oatmeal in cold water for at least 30 minutes to make it suitable for eating.

Conclusion

Oatmeal is a delicious breakfast that you can make within minutes in the morning. If you’re tired of having burnt toasts and don’t have much time to prepare a fancy breakfast, oatmeal is the perfect breakfast for you!

Preparing oatmeal beforehand and reheating stored oatmeal doesn’t reduce their nutritional value. You can store oatmeal for a long time and reheat using a microwave or stovetop. Even a baking oven would work if you can cook it properly. Hope our article on how to reheat oatmeal was helpful for you! So, save your precious time in the morning and stay energized for the day with the help of this nutritious and delicious meal!

How to Reheat chipotle Bowl- The Ultimate Guide

0

Do you love eating chipotle?  If yes, then dumping the leftovers must be quite a difficult task for you, right? But, there is always a solution to all the problems. Similarly, this article is perfect for you if you hate wasting chipotles. As in this article, you will get to know about how to reheat a chipotle bowl. You will get to know about multiple different methods that you can perform through various equipment such as oven, stovetop, microwave, etc. Bid goodbye to the worry of wasting anymore of this delicious food.

Fill This dish with mouth-watering ingredients, which brings it under the category of the utmost delicious dishes you can ever consume. So, let’s move ahead and learn more about chipotles and how to reheat them.

What is a Chipotle Bowl?

Chepotle bowl

Chipotle Bowl is one of the yummiest dishes that you will ever consume. It is a bowl full of healthy vegetables, rice and many other yummy elements. You do not have to shift to unhealthy for pleasuring your taste bud. Now you can consume healthy and tasty together with the help of Chipotle.  It falls amongst the category of most famous and delicious dishes. The amazing part is that you can add any vegetable you like or several other food elements to it, which you assume can make it tasty.

Constituents in a Chipotle Bowl

It carries multiple constituents, which is the reason behind its being delicious. You can add various types of vegetables, sauce and garnishing to enhance its taste. Let’s see the constituents that it contains:

  • Baby Kale
  • Baby Spinach
  • Bay Leaf
  • Beef
  • Bell Pepper
  • Pepper
  • Corn
  • Oregano
  • Onion

You can add other vegetables which you love. There are plenty of options for you to apply to the main dish as dressing, such as different types of sauce. You can include multiple others according to your liking. Which states that you are not free to inputting the main elements inside Chipotle. It is extremely simple to customize this dish in any manner, so it becomes tastier to construct it according to our wishes. It will be very simple for you to consume it after learning how to reheat chipotle bowl.

Can you store the Chipotle in the fridge?

Yes, it is completely fine to store it in your refrigerator. For this very reason, you will be given a cover for the container to be covered by it while storing in the fridge. You can stick to an optional tip, where you could eliminate the vegetables kept as toppings on the bowl before keeping the bowl in the refrigerator so that they do not get soggy. This step may assist you during reheating the bowl. 

What is the best method to reheat your chipotle bowl?

The effortless and perfect way of reheating your chipotle bowl is by gathering all the constituents to warm in a utensil that is ideal for microwave and heat it for one minute. After that, you have to mix it well and then reheat it for one more minute. In this manner, you can quickly and without any complication reheat your bowl.

Methods to reheat a chipotle bowl

Now, we all are aware of various methods of reheating. Here, we will go through few techniques that will allow us to perform the same. Therefore, let’s reflect upon a few techniques that will help us learn how to reheat a chipotle bowl.

How to reheat the chipotle bowl with the Skillet?

Amongst the multiple techniques, reheating through a skillet is the simplest option. Reheating through this technique falls under the best manner to enhance the taste of the elements. Let’s go through the steps

Steps to consider while reheating chipotle bowl through a skillet:

Step 1: Eliminate all the garnishing from the dish to remain crispy and do not go soggy or lose its taste.

Step 2: Heat the Skillet on moderate heat upon the stove.

Step 3: Include a little amount of butter in the Skillet.

Step 4: Put the remaining ingredients of your bowl above it.

Step 5: Mix the ingredients available in the Skillet during the reheat.

Step 6: Cook properly for about 3-4 minutes and keep mixing through the complete procedure.

Step 7: When the constituents get completely reheated, you must shift them to a proper dish.

Step 8: Then, add the remaining garnishing constituents that were eliminated initially, and you got yourself a perfectly reheated delicious chipotle bowl.

How to heat up chipotle bowl in oven?

chipotle bowl in oven

Reheating a chipotle bowl in an oven may consume some duration in executing the procedure, but it is surely another choice to try, and there is no doubt in the fact that you will receive all of it completely hot and sizzling. So now, let’s reflect upon the steps that will teach us how to reheat chipotle bowl using an oven:

Step 1: Eliminate the toppings like lettuce from the dish before putting it inside the oven.

Step 2: Then, you are required to preheat the oven until 350° F.

Step 3: After that, you are required to keep the constituents of the bowl in a protective dish of the oven.

Step 4:  Seal the warmed utensil with the foil.

Step 5: Reheat the constituents for around 20 minutes or until the timing gets heated according to requirement.

Step 6: Then, remove the dish from the oven and shift it to any container of your choice.

Step 7: Now include the garnishing you eliminated in the first step, and it is ready to be consumed.

How to reheat a chipotle bowl in an air fryer?

This method is for those who own an air fryer and want to try reheating on it. Stick to the steps given below to easily reheat the chipotle bowl in an air fryer:

  • First, to begin with, is eliminating the garnishing from the dish so that it does not get too soggy.
  • Then you are required to preheat your air fryer to 325° F.
  • Then you are required to keep the container in the air fryer and heat it for around 15-20 minutes or to the timing it gets heated according to your convenience.
  • Now put the toppings, and the dish is ready for you to consume.

How to reheat the chipotle bowl by the microwave method?

If you want to go for the most uncomplicated method for reheating and the one which is comfortable in access, then the microwave method is perfectly ideal for you. However, the important thing is, you have to keep in your mind, the bowls for storing chipotles, are created from paper. Which is not ideal for the microwave. This is why the recommendation is to shift the constituents into a perfectly ideal dish for going into the microwave.

Now, let’s reflect upon the measures you need to follow for reheating a chipotle bowl in a microwave.

Step 1: As you do in all the techniques, eliminate the garnishing to let them remain fresh.

Step 2: Then,keep the remaining constituents in a dish that is suitable for microwaves.

Step 3: After the previous step, begin heating the bowl for around 25secs.

Step 4: Then, you need to give a smooth mix to the constituents to ensure they are getting properly heated or not and then keep it once again into the microwave for more than 20-25 seconds.

Step 5: Now, you need to check how warm the Chipotle is and whether it is suitable for consumption.

Step 6: Then, include the eliminated garnishing of the dish on the top. You can also include new garnishing items if you like on the dish.

Step 7: Now, you have got yourself a ready-to-consume, properly heated chipotle bowl.

Now that we know almost all the perfect methods of reheating a chipotle bowl, let’s have a look at some of the questions asked by plenty of people.

Frequently asked Questions

  1. How long does it take to reheat a chipotle bowl in a microwave?

The duration relies upon how much temperature the leftovers keep at and the amount of eatable kept in the microwave. These two factors determine the duration required to reheat a chipotle bowl. If kept at room temperature, it will be uncomplicated and faster to heat the eatable than the one just taken out from a refrigerator. But usually, it consumes around one min to reheat the chipotle bowl in a microwave.

  1. Is it safe and secure to microwave Chipotle?

Yes, it is fine to microwave chipotles. Reheating the eatables in the microwave is the most executed technique amongst the others, as it is the fastest way to heat food. Although, there are a few tips that you must stick to while using this technique. Let’s reflect upon a few of them:

  • Please don’t make the mistake of heating the Chipotle in their paper packing when using a microwave.
  • Never forget to shift the constituents of Chipotle from the dish that is meant for microwaving and heat the item to 160°
  • As the residue is believed to get easily spoilt. Regarding this, you are required to store it in the fridge before beginning the process of reheating.
  1. how to reheat chipotle bowl without microwave?

Go for several other techniques or tools to reheat a chipotle bowl if you do not have a microwave. Search for the tools like an oven. You can go for the assistance of an air fryer, Skillet and stove up instead of a microwave. You have plenty of options that will assist you in reheating the chipotle bowl.

  1. How to Reheat Chipotle Tacos?

Reheating a chipotle taco is not much of a daunting task. It is a much uncomplicated procedure. You can access several tools to reheat tacos, such as an oven, a microwave, a skillet and others. If you are going for the procedure through an oven, then everything that you should stick to is:

  • You need to preheat the oven at 375° F.
  • Then you need to keep a taco shell on the dish, which has a cookie sheet and then warm it for over 15 – 20mins.
  1. Can you eat leftover Chipotle cold?

It is fine to consume a cold Chipotle. You may not face any issues while eating it cold as you amalgamated the constituents properly and will provide the taste you desire. However, each of us must remember this point, that it does not lose its taste after getting cold.

  1. How to reheat chipotle Queso?

To reheat the Chipotle Queso, the foremost thing to stick to is to insert it in the microwave. Then, keep it there for 25 sec and after that, stir for a while. After which, again, you need to store the Queso in the microwave. Repeat this until and unless you receive the amount of thickness you require in it.

  1. How to reheat Chipotle Burrito?
Chepotle bown

Now, you need to stick to the steps mentioned below if you want to easily reheat a Chipotle burrito:

  • In the very first step, you should preheat the oven at 220° F.
  • Then, easily fold the burrito in an aluminum foil after removing it from the fridge.
  • Then, you have to insert the burrito into the oven for more than 25 minutes.
  • With the assistance of the oven mitts, bring it out from the oven. And the point to memorize is that you should keep checking its temperature with the assistance of a suitable thermometer so that you get to know whether the burrito is ready to eat or not.
  1. What are the perfect methods for reheating the chipotle burritos?

There are plenty of methods to reheat this item, and almost all of them are much uncomplicated to perform. The techniques to take assistance from are oven, air fryer, stovetop and many more. But, amongst these, the oven is the perfect technique to reheat a chipotle burrito.

Conclusion:

Let’s admit to the truth that very few people exist who do not like eating chipotle, right? Hitherto, each one of us needs to know how to reheat the chipotle bowl. This article will help in reheating the bowl in every suitable way. So you do not have to worry about not knowing anything about heating chipotle, this article is here for your rescue, and you can easily do it on your own once you go through all the methods mentioned in this article.